Friday, December 1, 2017

Slow Going...

Oh my goodness what a crazy few weeks the last couple have been.  A new job with lots of new things to learn has left me I guess mentally tired and I've not even felt like stitching.   My rabbits have horrible teeth so they've just cost me a fortune in vet bills (thank goodness I'm now working) and my new ducks are trying at every opportunity to make babies with my existing disabled ducks so I've been playing 'love police' every five minutes.  And now the 'old' ducks need vet attention as well.  Flipping heck!  Anyone want some randy ducks?? 😜

So yeah, if you've stopped by hoping for great progress I'm afraid you're not going to get it.  I have learnt however why a lot of blogs fail (maybe).  You feel pressure to write something (and hope its interesting) and sometimes life just gets in the way.  So I am still here just not getting much done.

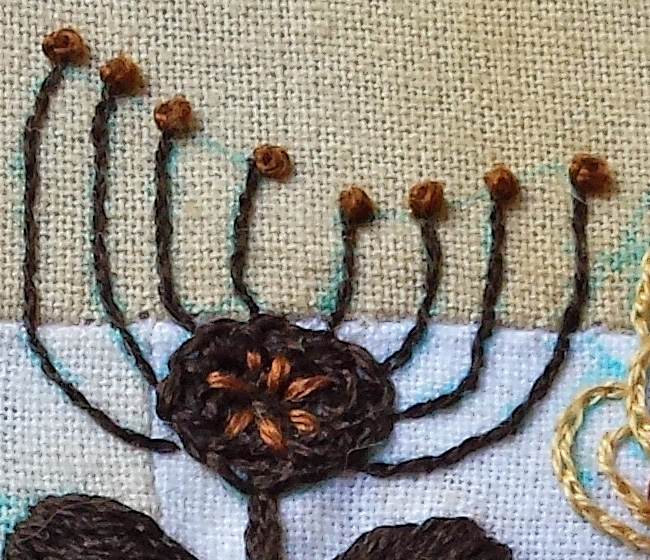
So how much progress have I made?  One wing, yep just one.  There are plenty of tutorials out there.. but I've taken a few 'starting off' photos in case anyones curious.

With wings and petals etc that stick up from an embroidery you need to use wire.  "Wired shapes' is what they're usually called if you're googling for info.  You need the wire to provide some stiffness when you cut the petal out of the fabric after its all stitched and pretty.  The wire also helps you push the wing into the required shape or at the required angle.  I've read a few 'how-to's suggesting you use florist wire,  I found some of that at the local craft store but found it too thick and there was only the 1 option.  A week later I found some jewellery wire which is much thinner and much nicer.

So in a nutshell you need to then couch the wire down to your fabric.  I have found the easiest way to do this is to bend it into a rough loop and then as you couch you pull the wire until its sitting on the outline of your wing.  Some people use tweezers apparently but I would've thought that could end up putting kinks in your wire which you don't really want.  Not for a wing anyway.  It is a bit fiddly this bit and an extra hand would come in handy but its do-able and once its couched down its plain sailing.  Oh! they recommend at least 2 inches of wire hanging out (so 4 inches in total) for attaching the wing to another piece of fabric and then securing.  And you want them really secure when you get to the attaching bit because people are apparently quite keen to touch them simply because they stand up off the fabric - who knew?!? haha


One tip I've learnt along the way is for the ends of the wire, use some tape to stick them down.  Otherwise you'll end up getting your thread caught in them time and time again.  I've found that Micropore works really well, you know the paper tape they use for medical dressings and the like.  What I find good about it is that you can actually lift it and shift it.  Because you want to get as many wings (or whatever) out of the one piece of fabric I squished them all in without even thinking about all the extra wire hanging off.


So once you're all couched down you need to run a buttonhole stitch around the wire to probably secure it and make sure you fabric doesn't fray when you cut out the wing.  I have seen some suggest that you actually do the buttonhole stitch AFTER you've filled in the wing.  I haven't tried this, but I might with the next one.  Anyway, you want those stitches really close, you're trying to completely cover the wire.  I've seen another suggestion of using a permanent, acid free, etc felt pen to actually colour the wire the same colour as your thread before you do the buttonhole stitch just in case you can see a wee peek of the wire showing through.  Another good tip I think.  When I did my poppies, I managed to find some red jewellery wire which I used instead.


So here is my solitary little wing.  I found a tutorial for wings that suggested actually putting the 'veins' in first, which I did in this case.  Not sure I like it, but its about the journey not the destination, right?  haha

Sometimes I do wonder if I have learnt anything at all about embroidery over the last couple of years.  What made me think that stitching white thread on white fabric when I can only stitch at night was a good idea??  Headshake.  I think the key word here is thinking... I didn't think I just wanted to get at it!  And it shows.  Oh well.

Anyway I'm afraid thats all I have for now.  Take care!


Thursday, November 16, 2017

So... What Next?

I've spent the last week full of a horrible cold, topped off with going back to work 3 days a week, a school athletics trip, sick animals and just generally feeling fed up.  Which is very naughty when really I'm very fortunate for all that I have.  Anyway, needless to say inspiration has again been lacking.  I don't know how many embroidery samplers I've looked at recently and not a single one has inspired me to make a start on my stitch book.  Or anything else for that matter.  And I find that just ends up with me feeling even more uninspired.

So what did I do? Well I went back through my Pinterest boards and had a look at the things that I've pinned on the basis that 'I like them' rather than 'I should try them'.  I'm not looking for another big project as I don't think I'm going to have time for awhile, but I need something that I can pick up and put down as required.  And something to stop me having to watch all the Car programs on the TV that hubby likes.  😊

So what did I decide?  Butterflies.  In particular stumpwork butterflies that will let me also practice needle painting.  I bought the A-Z of Stumpwork last year and worked through the various stitches. Made a mini stump work sampler just to try out the techniques.  I also did the Celeste Chalasani stump work Poppies project on Craftsy early this year which I enjoyed.  Of course there are the books by Jane Nicholas and some of those look amazing.  But anyway... yes butterflies! I'm going to make some butterflies.  Well I'm going to TRY and make some butterflies.  So watch this space, there could be another disaster happening any minute haha.

I think I'll start with a fairly simple shape, I quite like these ones below.  Fairly simple shape to start with and nothing too intricate colour wise.


Tea or Coffee is done!

So I think its come out OK, especially seeing it was just using up some scraps.  I do like the way the stems connect the various flowers.  I still don't like those big flowers, although I wish I had done the first two a bit more open like I did the third one.  And I think that bottom area is a bit light on colour variation, compared to the top half.  (shrug).  I think it looks better in real life than it does in the photo.  It is what it is, gave me something to keep me occupied and I learnt a few things.  Another piece for the drawer. 😝

Thanks for stopping by!


Wednesday, November 8, 2017

A bit more 'Tea or Coffee?'

Don't you just hate it when you run out of thread?  Well a particular colour of thread.  

When I first started embroidering 2 years ago I dug out my old cross stitch threads and I had 3, nearly full, skeins of DMC 3371 (the very darkest brown) and I remember thinking 'I'll never in a month of Sundays use all that'.  

Never say never Kimberley!!!  Because I just ran out, not after finishing a flower or stem but right in the middle of it, probably another 2 inches of thread would've done it.  (grumble grumble).   But all is not lost, I've called the store closest to Hubby's work and there are 2 skeins (I'm not taking any chances) sitting on the counter waiting for him to pick up on the way home.  Who says he doesn't have his uses?? 😝💋


Anyway, not too much left to go now, although all the bits currently accessible in the hoop are predominantly 3371 (of course they are!).

I took the whipping off that centre flower, I tried living with it for a few days but it wasn't growing on me.  I've left the large light coloured flower to the right a bit more 'open' and we'll see how that sits once the lower bits are filled in.  The one thing about this design that I don't like is those big flowers and I must say that after stitching them they haven't gone up in my estimation either.  😀

Never mind though its all just for fun.

Latest learnings:
  • Next time I decide to stitch onto a pieced fabric try and use a backing fabric as well.  I'm not sure if everyone finds this or if I just spend too much time pulling/tightening my fabric in the hoop.  The original swatches were pieced together using a machine, ironed flat and all that.  But a number of the seams have still looked a bit, um, just not secure as I've then hand sewn over them.  And I wonder if a backing fabric may have helped this.  (or just added to the issues haha).  Although I guess thinking about it crazy quilters often piece onto a backing fabric as they go to get all those fancy shapes, so maybe thats how they get around this type of issue.
  • Next time I buy linen give it a good tug and stretch before buying it.  The darkest bit of fabric on the bottom left is some type of linen that I bought at the fabric store (its not an embroiderers linen) and the weave is so loose.  Although again I guess a backing fabric would help here.

What next?

So I'm starting to think about what do once this project is done and I really do like the idea of a stitch sampler and the more I look at the one I already started the more I think I've moved on from that and the style of it isn't for me any more.

So I found these drawings of leaves online and I'm thinking they make quite good inspiration for a stitch sampler.  Ideally I'd like a fabric book that I can just pull out when I'm looking for a 'look' or a certain stitch.  So I might ponder these for a few days and see if I can come up with a bit of a plan.

I also haven't forgotten that I need more needle-painting practice.  So I should keep my eye out for something not too serious that will give me some more exposure to that.

I'm back to work next week so stitching time is going to be drastically cut.  😂

Thats it for now.  Thanks for stopping by.


Friday, November 3, 2017

Tea or Coffee?

Well I've made quite a bit of progress on this during the last few days and pleasingly I've used a few different stitches (go me!).

Those big flowers have done my head in a bit.  There was too much of that yellow-y colour so I added a bit of the brown.  I don't mind the smaller of the two flowers (top of the pic), but I think I've gone a bit too far with the larger one (bottom of the pic).  But before I rip it out I'm going to fill in around it and see how it sits then.


In case anyones interested in the detail here is some closer up photos and the stitches used.  Please of course excuse the washable pen marks.


Dark French knots in the centre, surrounded by two rows of buttonhole wheel in the mid range brown.  And then buttonholed the whole way around the resulting outer circle.  Then in the dark thread again surrounded with herringbone, and fly stitch.  With more French knots inside the fly stitch.


Chain stitch filling, with split stitch stems, topped with French knots.


Split stitch outline, with back stitch detail in the outer petals.  Feather stitch detail in the centre petal with French knots on the ends.  And a sprinkle of French knots top.


Satin stitch centre, surrounded by running stitch. Then split stitch outline for the petals, with (badly) needlepainted centres.  Back stitch 'spokes' topped with detached chain.


Split stitch stems (its my favourite stitch) with detached chain leaves.  Satin stitch yellow, edged with more split stitch, and a bit of split stitch filling for the top of the flowers while I was there.


French knot base in the dark colour, with needlepainted 'petals'.  Centre stems are done in continuous fly (I thought this had a name all of its own, but I can't seem to find it).  Outer stems split stitch topped with French knots again.
So not a lot of different stitches, but already more than I expected I would use.  😀  While I generally try to stitch to two strands of floss for Chicken Little to keep them the 'same', its quite nice chopping and changing from 1 to 2 strands to get different effects.  

Learnings - So much more practice required for needlepainting.  (maybe that should be my next project).

Blogger limitations

I've also spent some time this week trying to figure out how to reply to comments.  It seems that this feature of Blogger is sadly lacking.  So please know that I do read the comments and its really nice to know there is someone out there reading my ramblings.  If anyone else also uses blogger and uses a third party comments thingie that allows replies then if you'd let me know which one you use that would be FAB!  Because currently I'm just a bit confused haha.  (Nothing new there!)

Excitement factor 9

Nothing to do with embroidery.  But the hens starting making a bit of a ruckus last night and we ran out thinking something was attacking them.  But no, we had a visit from the Three Little Pigs.  Well Ok not THE Three Little Pigs, but 3 wild pigs all the same, just young ones.  Hubby got this photo from our deck of two of them.  While we were super excited to see them we stayed safely on the deck as we weren't that keen to meet their Mumma (we're so brave - NOT!).   The poor things will probably end up on someones dinner table at some point in the future but for today we just appreciated their visit.  🐷🐷🐷💗

Until next time!


Friday, October 27, 2017

The Sampler

Ugh I was sure it was ruined but the pen washed out! - PHEW!  Not that its moved since I washed the top half of it mind you.  Probably should remove it off the heated towel rail before someone dries their hands with it.  Although both hubby and Miss P wouldn't dare haha.  But Dad is probably coming for tea tomorrow and he would! haha.

Tea or Coffee?

Well I did as I said and randomly sewed together all my wee tea and coffee dyeing swatches.  I just needed to get moving on something, I was going crazy.  

I didn't think about it, I just paired them up into twos where they were about the same size, or at least the same length on one side.  Then repeated the process until I had a piece about A4 size and blow me down I kind of like them!


Now I had a cool piece of fabric (when I say cool as I generally stitch on plain white calico, anything thats not that is cool haha) what to do with it?    There was a doodle image that my eye kept getting drawn back to while I was trying to find something new to stitch.  
I thought it could be quite a good piece for using a pile of different stitches, sampler-esque even 😀.  Now usually when I look at these things and think 'yeah all different types of stitches' it never works out that way when I sit down to plan it out.  I'm sure it won't this time either.  But at least I know that going in right? 😀.  So I'm not going to put any pressure on myself to use a gazillion stitches, I'm just going to go with what takes my fancy at the time.   Its supposed to be fun, not stressful after all.


So I've got fabric, I've had my reality check about all the stitches I probably won't use.  While I like the original colour scheme, I don't think its going to work on my fabric, so I decided I'd stick with the tea and coffee theme and tried to match the darkest of the fabric colours to a DMC thread which I did and then I picked a few others in that range of colours.


Its not my usual colour scheme and it definitely has a lot of that very dark colour right now, but there is something about it that appeals.  As you can see I've got the design roughly drawn out on the fabric.  I haven't put it all on there, just the bigger bits, as I'll tweak it as I go so it works as an embroidery.

If nothing else,  I just feel so much better for having something to work on - yay!!!

Ta ta for now!

Monday, October 23, 2017

Oh bother!

I haven't done any stitching for days and days.  Why?  Because I can't make up my mind what my new project should be.  While I love Pinterest, I am sure at times, its not healthy for any 'creative' person.  There are too many beautiful things to look at, too many various techniques to try.  And I don't know about anyone else but I find I just end up giddy with all the options.  (head shake).  So this last week I have been looking, looking, looking but not stitching.  

I've picked half a dozen things and thought yes I'll do that.  
  • Boro - I love the look of Boro but my stash is pretty limited and I just couldn't 'see' the fabric combination.
  • Embroidery collage - I love the look of those lace-y, ribbon-y, collages of embroidery.  But I'm not a ribbon-y lace-y person and not feeling confident enough to make a start.
  • A Cat - I found a drawing of a cat, similar style to Mr Bear.  But I just did that.
  • Stitch & Slash - where you sandwich lots of diff fabric between two pieces and then cut through varying layers to reveal the inner.  Again limited stash put paid to that for the minute.
  • Sharpie 'painting' - Miss P and I had some fun with sharpie and isopropyl alcohol a week or so ago.  Didn't come out anything like the tutorial.  But I do have some colourful fabric that I could use for appliqué maybe or the stitch/slash.  But just not feeling it.
  • Stumpwork beetles - I love those framed embroidered bug collections.  But again just not feeling it.
I think my mojo is just off.  Any of those things could be fun. 

I love the idea of samplers, so I've spent some time today trying to come up with a plan for a stitch sampler than I can turn into a fabric book.   Trying to find something that takes my fancy is proving difficult, then I remembered I already started a sampler.  Yes!    

Mid last year I realised that my chickens were never going to make it onto a wall and decided I wanted to make a sampler that I could (maybe) put in a frame.  I wanted to use small cliparts I found on the internet, all the ones I'd found while looking for chickens. 😀    But I came to a grinding halt when I found I had a pile of 'line' style stitches that I couldn't figure out how to incorporate into wee clipart type images.  Now thats perfect, something to stitch while I figure out what to do next.  Something I can pick up and put down in between projects.  Yes!

So I dragged it out today tried to photograph it as it was, didn't work - too many wrinkles from being stuffed in the drawer for a year.  So I ironed it of course.  Now I have the sinking suspicion I've just ruined it.  Its still got all the washable pen on it which I've in effect just heat set.  (insert all sorts of rude words here).    Sigh.

Anyway, I guess I'll have to give just the top bit of it a wash and see if the pen comes out.  (I still need a lot of the lower pen marks for guides for text etc).  So now I'm sitting here wanting to stitch and I still have nothing to do.  Grumble grumble.

I've put the dreaded photo below.  Each square is about 1 1/2 inch square if you're wondering.  

If anyone has seen my mojo, feel free to kick its butt and send it home.  Thanks!

Until then, I'm going to dig out all my tea and coffee dyed swatches and just whack them together and see if anything comes out of that.   Maybe I'm just over thinking it all and just need to get stuck in.  Worst case scenario I'll learn something right?

Thanks for stopping by. 😀


Sunday, October 15, 2017

Mr Bear - He's done!

Gosh this guy has driven me crazy this week.  I've stared at him this way and that, I've picked him up, I've shifted him about.  I spent a day or two playing with my cheesecloth buttonhole wheels in what can only be explained as totally avoiding him.  

The felt pieces were way too thick, they looked ok in the photo, but in real life they were awful.  I thought for a few days about filling the eye sockets with stitches, but that would've put too much focus on those eyes.  Sigh... I think I hated Mr Bear a bit this week.  I even thought about tossing him in the drawer and starting something else.  But Miss P has her heart set on him.  So I rifled through my stash and found some plain black cotton, did a bit of a test.  Decided that a single strand of floss for the eye highlights was too thick, so I used regular sewing machine thread.

Even now looking at the photo I'm regretting that nose.  I tried to put a few stitches across the top of the nose and couldn't get them right, so I pulled them out.  Arghhhh.  Hmmm he needs something on the top of that nose.  I might well end up hating him again this week.

But we'll see.

Oh I found out who originally drew this guy, a Russian graphic artist called Olga Gamynina.  Thanks Olga, hopefully I did you proud.


Wednesday, October 4, 2017

Nearly there...

I've finished the main stitching on Mr Bear.  I've cut the felt out for the eyes and nose this evening and they're currently just sitting on the fabric.  So far I'm fairly pleased with the result. 

I'm still not happy with the area under the chin, but I unpicked it and re-did it as I said I was going to last week.  And then I unpicked it and re-did it again.  As I'm only using cheap calico I think after three goes at it I was seriously starting to risk the fabric just coming to bits.  So after the third crack at it I made the call, thats it.  It is what it is.  Suck it up buttercup and move on!

I've just noticed posting the photo below that the blending of the eye on the left is a bit lumpy.  It needed a few more stitches but I seem to have created a lump now, so I'll have to have another go at that.  Sigh...

So... the felt.  I always feel eyes either make or break a piece, whether it be a painting, a quilt, a sketch whatever.  The original image has the eyes almost appearing as recessed.  There is no way I'm going to be able to achieve that especially as I'm using felt for the eyes.  But I don't want them appearing to pop out either.  So I somehow need to attach the felt without creating too much height.  And then of course I need to create the accents at the bottom of the eyes and the top of the nose.  Not sure what colour I'll use yet.  White is going to be TOO white. 😁  So I'll have to have a play around to get a light colour without getting a colour that is going to stand out.  That makes no sense does it?  I guess what I'm trying to say is that I don't think the highlights on the eyes and top of the nose on the original image are a focus of the original image.  So I don't want to make them a focus of my embroidery either.  For example the felt for the top of the nose currently looks too deep, but the sketch has quite a light area at the top of the nose, which I was going to fill in with stitches in light thread to blend it into the rest of his nose.  But even as I type this I'm thinking that maybe I should be trimming the felt along the top there and actually using stitches in black on the fabric to blend that area.  Hmmm...

Argghhh!  Why is it the last 5% of any project ends up causing 95% of the angst and effort? Haha.  But while I've not got much of an audience here (although I love you guys that do regularly stop by), if nothing else I'd definitely recommend blogging about your projects.  Taking a snapshot of your progress definitely gives you a bit of distance from it and that different perspective is really useful.  And explaining your thought process to someone else also gives you enough of a pause in the proceedings to allow room for alternative ideas to pop into your head.  I think I understand now why some quilters pin their projects on a wall where they'll walk past them when they get stuck for inspiration.  Its both that physical distance and that mental distance of just not being caught up in the process of getting it done.  

Anyway, I'm waffling (again).

Thanks for stopping by!


Wednesday, September 27, 2017

Mr Bear Progress

Haven't had too much time stitching over the last few days.  But I've made a bit of progress on the bear.

I think I see a whole lot more unpicking in my future.  While I was really pleased initially with the dark area under his muzzle.  Now that I'm actually filling in the stitches around his shoulder area I've discovered some problems.

1.  I've taken the stitches too low under his muzzle
2.  Those same stitches are too small and are not going to blend into the other stitches
3.  Also I'm not liking those triangular areas on his 'cheeks'.  They're definitely supposed to be a bit closer in that area... but I think its too dark.
4.  Not a big one but I think I need a few more stitches under that left eye, its just not blended enough out to the lighter stitches.

I am enjoying stitching him, and thats what counts at the end of the day and Miss P has already called dibs on him when he's done.  The big battle (for me) will be getting those eyes right.  I am dreading those.

Thats it for now.  Thanks for stopping by.


Wednesday, September 20, 2017

Mr Bear

Well I've made a start on the bear.  I've done a rough attempt to trace out the darker and lighter sections onto my fabric (calico again).  That in itself was a bit of a mission as even using a lightbox trying to figure out where the area changes are wasn't that easy.  But I was only after a rough idea and hopefully what I've marked out will be enough.

I had a quick play on a scrap of fabric and decided that the lighter stitches will be done with 1 thread and the darker 2 threads.  And I'll just change the size and closeness of the stitches to get the diff 'textures' of the pen strokes  That and try and follow the direction of the pen from the original image.  And if that doesn't work then I'll just make it up as I go 😀

I've already discovered that when you're sewing in just one colour its very hard to see the picture appearing.  And I guess with this type of image the close up view is not what you're actually aiming for.  You need to step back from it to really see the image.  Its funny how much better it looks in photo form than it does sitting on my lap.  I guess thats just down to that extra distance.

I'm still pondering the nose and eyes area.  I'm thinking of a black felt to get that really dark colour.  But then the debate will be whether I just stitch them down or I cover them with stitches.  Hmmm something to ponder over.


One thing I have found since I took this photo is that running stitch is too orderly for this image.  The strokes of the pen I believe are done in rows across an area not up and down.  I discovered this the hard way of course.  So I unpicked it and am now back doing straight stitches.  I'm not sure if that makes sense so I've tried to illustrate it below.  Not that my running stitch is any where NEAR that precise.  But it does illustrate the columns of running stitch versus the rows that I mean.  


Anyway I better go and get my day started. Until next time!


Saturday, September 16, 2017

Chicken Little #100 - Drizzle stitch

Here she is, Chicken Little number 100.  I think this is my favourite chicken yet.  

Drizzle stitch is of course usually an upright stitch but in order to get her hair to sit 'nicely' I gently tacked each drizzle down in a couple of places.  If I was going to moan about anything it'd be the second 0 in one hundred, it just didn't want to be the same size as the other numbers.  But if thats my biggest complaint then I reckon it came out OK.

If you go to the Chicken Little page above you can see the whole flock.  (next to Home)


Kantha

Just thought I'd throw another photo in of the Kantha piece now its washed and ironed.


Whats Next?

Well yesterday I found a cool sketch of a bear, basically done in just dashes.  So with my running stitch kick I'm currently on I thought I'd have a go at translating that into stitch.  Spent a good wee while finding the right image, making my pattern, having a think about how best to go about it, getting my fabric all ready and then.... NO black floss!! Argh.  I used it all up on the Kantha piece and  didn't have any spare.  Insert rude words here!.
So what to do?!?  Well I spotted some pictures of embroidered cheese cloth the other day, or what we call here Muslin.  Very thin, very loosely woven.  The idea being that you can pull your stitches tighter of looser depending on the look you're trying to achieve.  Now I'm not a big fan of buttonhole stitch (well the whole family of them actually) but this kind of thing doesn't require any great tension, you definitely don't want your stitches to be of a uniform size.  The piece I saw also used running stitch just to pull various areas together but I actually liked the look of buttonhole wheels best.   No idea what I'll do with it (and now I'm out of white floss as well), but maybe it can form part of my fabric book if I ever get that off the ground.

No plan, just making buttonhole wheels until I'm done with it. 😁


Thursday, September 14, 2017

Kantha Progress

Well its done.  All bar the washing of the pens marks, ironing etc, so I guess what I mean is the stitching is done. 😀  And yes I unpicked most of it and re-did it, even the white birds at the top which I liked. But I like them even better totally filled in.

Some things I've discovered about myself during this:
  • I like embroidery thats 'coloured in', all my Chicken Littles for TAST are generally outlines, but I prefer embroidery that fills its space.  It doesn't make sense to do that for my chickens because I just wouldn't have time to crank one out each week and I'm not trying to create a 'work of art' I'm just trying to display the current weeks stitch.
  • While this isn't a great example of Kantha at all, I really like the simple design.  I love the fact that I've created something with a simple running stitch.  And I'm eager to do more.
  • Straight lines are for even weave fabric only.  Not cheap calico.  Enough said.


TAST - Drizzle Stitch

Well we're finally here, the 100th stitch of this round of TAST - Drizzle stitch.  I actually played around with this stitch a few months back while working my way through the various stitches/techniques in the A-Z of Stumpwork.  And I then used it quite a bit for my encrusted piece.  

I did have a chicken image all picked out for stitch 100, but when I saw it was Drizzle stitch I knew just the image to use and it wasn't the one I'd picked out.  Oh well, the best laid plans and all that.

I've made a start on it and I'm pleased so far with how its turning out.  I think it may well end up being my favourite chicken yet!  🐔

The tutorial for Drizzle stitch on Pintangle is here and I've borrowed one of Sharons images below.  It looks a bit weird sitting there all by itself, but they're usually sewn in groups and can be as long or as short as you like.


What Next?

So yet again, I'm back around to what next?  I'm still feeling quite enamoured with the whole running stitch idea.  But I'm also keen on the blackwork idea, in particular showing shading with only black.   So I'm thinking I might start some experimenting with both/all of those.  Black, shaded running stitch.  What could possibly go wrong?!!? 😜

I'll post Chicken Little Number 100 in a day or two.  Until then Ciao!

Sunday, September 10, 2017

Chicken Little # 99 - Woven Chain Bar

Quite a fun wee stitch this one.  I believe in theory it's supposed to be a considerably longer chain used to couch down threads, ribbons etc.  In this instance I actually couched down the threads using a single strand of floss so they were fairly secure and then used the woven chain over the top of that.  They make pretty good chook feet I reckon.  :-)


Wednesday, September 6, 2017

TAST Stitch # 99 - Woven Chained Bar

Number 99 this week... sigh...  what am I going to do without TAST each week?  I haven't got a definite plan for this weeks stitch but I'm thinking the woven pieces look a bit like feet.  So some chicks perching on a bar maybe?  The tutorial on Pintangle is here and I've borrowed Sharons photo below.


Kantha progress

This was initially going to be the first piece for my fabric book but now I'm unsure.  

I think I've probably done more unpicking than stitching on this so far.  There seems to be a lot of books available, but not a lot of information online unless you're making a quilt, rather than a picture style embroidery.

What I know:
  • Running stitch using two strands of silk thread (I'm using DMC floss because its what I have)
  • Colours - traditionally reds, rusts and golds, but as time progressed any colours.
  • Stitch length, no real guide to actual stitch length but the gaps between stitches should be half the length of the stitches.
  • You can pile the stitches up side by side, or slightly offset between the rows.
  • Seems to be a lot of work where the outlines are done in black.
What I've found:
  • Getting my stitches to be of an even size is hard, but no doubt just practice.
  • Getting the stitch rows close enough together is also hard, but again probably just practice.
  • Not sure that 2 strands of DMC floss translates to the types of silk threads traditionally used.  It seems a bit thick, especially for the outlines.  I wonder if a single strand would work better.
  • I've decided rather than placing the rows of running stitch slightly apart (almost like seed stitch filling) I prefer more of a double running stitch for the filling and thats what I'm going to go with now for the filling (hence all the unpicking).
The image I'm using as my 'pattern' I found on the internet, although I can't find a proper source for it.  The best I could do was an Indian folk art blog that once you get there takes you off somewhere else.  Anyway the image is out there, its not a great quality image so I had to tidy it up.

Now the perfectionist in me after about half an hour was going crazy and I was already thinking about needle painting it instead to get a smoother finish.  But I persevered thinking its practice, my stitches will get more even, etc, etc.  As you can see the top birds bodies have rows of running stitch and I actually quite like them like that (although I'm going to unpick those wings).  But I was much happier with the larger fish bodies where the two colours have in effect created a double running stitch.  So after I had sewn the lower birds in the same method as the top birds I decided to try the double running stitch for the bodies in a single colour and I think it looks much better.  (I've no idea if thats 'allowed' but oh well)  So I'm going to go and unpick all the various running stitch fillings and do that I think.

I actually really like the picture, yes its a crude simple design but its supposed to be.  There is something about it that really appeals to me and I can't put my finger on it.  And yes I could start again and needle paint the life out of it, or fill it with fancy stitches but I think it'd lose its charm.  Hmm.. dunno.  Time will tell I guess.

Right back to the unpicking 😁


Friday, September 1, 2017

Chicken Little # 98 - Triple Chain

Another cold and dreary day here today, which is the perfect excuse to sit and sew.  Who am I kidding? It doesn't take much to convince me its a good time to sew, but at least on a cold and wet day I feel less guilty about it.  😄

So close to the finish line now, number 98.  Triple Chain, tutorial on Pintangle here.  

Triple Chain almost has a feather look to it I thought.  Although it'd also be good for leafy stems I imagine.


Kantha

One of the ladies in the Year in Stitches Facebook group posted a photo recently of a piece of Kantha work she'd done and it was amazing.  So I've been doing a bit of googling about Kantha and have come up with a project of my own to try.

Kantha embroidery is basically a style of running stitch embroidery originating in West Bengal.  Its used for both artwork and quilt making.  Often done in yellows, golds and reds, but any colour goes really from what I can make out.  What I like most about it is the beautiful designs achieved with the simple running stitch.  Although I'm sure once I get started I will soon find out that achieving a consistent look with a running stitch is not that simple at all!

Part of the appeal of Kantha is the texture created by the multiple layers of fabric and how the running stitch creates an almost puckered look.  (Crazy that I've spent the last couple of weeks crying over puckers in my embroidery and now I'm trying a style that creates them!! I'm fickle, what can I say).  For this, my first foray into Kantha, I'm not using multiple layers of fabric.  I want to just try the technique and see if I can create something even close to the beauty I've seen created with this style of embroidery.

There's a link here to a short article about it and some beautiful Kantha embroidery photos.


Sunday, August 27, 2017

Chicken Little # 97 - Feather & Chain

Another chicken closer to the end of this round of TAST.  This weeks stitch was Feather and Chain, which as the name suggests is a mix of both Feather and Chain stitches.  The link to the tutorial on Pintangle is here.


I love the look on her face, you can almost hear her gasp.

I'm often asked where I get all these chickens from and I'd love to be able to taken credit for them, but alas I can not.   I have squirrelled away a ridiculous amount of chicken clipart over the last 18 months and I just browse through my 'chicken folder' until I find something that either fits or I can adjust to fit the current stitch.  

While a magician won't tell you their secrets, I'm not a magician so I've also included a shot of the original clipart.  As you can see I've only really used half of her, and I've used a mirror image to get the whole chicken.  Or there abouts anyway.  I really wanted a good expanse of belly to show the feather & chain stitch and that other wing was just in the way mostly.  😀


The Dyeing & the Fabric Book

The other day I was busy playing with tea, coffee, paint and some lemon juice to see what kind of colour results I could get.  Well lets just say its probably just as well I only used some small swatches to play with.  😁

The coffee by far gave a much deeper colour than the tea, I love the drip effect.  The paint came out well, I especially love the bubble wrap pieces.  The lemon juice was a total bust which was disappointing, but not unexpected.  The Tumeric produced a vibrant lemon yellow colour, the paprika and cinnamon, not so much.

Needless to say I ended up going shopping.  Yes I know I said I wasn't going to, but I'm weak.  

I can't say I'm too much closer on the idea for my fabric book.  But I do have some ideas for my next project, I think my sticking point now is that I don't want to hide the results away in a book that will probably just end up in a drawer somewhere.   Which is ridiculous considering I have 97 chickens siting in a shoe box haha.

I ordered some frames & mats this week for a few pieces that I've done recently (like my tree and the encrusted work) and I think I want to continue to frame up some bits, maybe create a wee montage above my sewing table.   So do I use my idea for the book or for the wall - ugh dilemma!  Although I guess I could start with a small version for the book and if that works out go larger for the wall.

Anyway so in short, progress on the fabric book idea, not much.  Plenty of options but nothing I deem worthy so far of sharing with the group.  The dyeing, meh, so so.  Will try and use the bits I dyed, you never know they might be just the thing.

Thursday, August 24, 2017

Mess or Masterpiece?

I've joined a new Facebook group about fabric books and while its only been running a couple of days I must say I'm feeling totally out of my league.  So I need to pull something out of my proverbial hat.   I, like so many others, have Pinterest boards up to the wahzoo with different styles of embroidery to try and I love them all and I want to try them all.  But where do I start to make something I'm not going to feel embarrassed about sharing with the group.  Thats the kicker.

Step One:  Spend a whole day pinning ideas into my newly created 'Fabric book ideas' folder.  
Result:  Left feeling totally overwhelmed with everyone elses obvious natural talent and artistic abilities.  Sigh.

Step Two:  Pick a theme, trees I like trees, lets go with that.  And I'd really like to try a mix of appliqué and embroidery.  
Result:  Euphoria.  Yay!  I'm getting somewhere.

Step Three:  Pin some more pictures of trees.  Ok but how do I then incorporate that with the fabric collage type thing?  Um...
Result:  Panic.  Ugh.

Step Four:  Pep talk to myself.  "You can do this.  You just need to make a start and the ideas will start flowing.  Go upstairs and have a ferret around and see what you've got."
Result:  Hope.

Step Five:  Do what I'm told and go through my stash of fabric.
Result:  Curse myself for getting rid of my quilters stash.  Find hot pink spots, stripes and zig zags, thermal lined curtain fabric and some cotton with a print that looks like a cross between fruit salad and cat vomit (where did I even get that?!?).  Any way NONE of that is going to cut it.  Back to panic.

Step Six:  Make a list of what I COULD work with.  White calico, cheap linen, denim, an old sheet that I already hacked up to make a mock up of a costume for Miss P and the woven-y woolly fabric I used to make the actual costume.  Well, I'm not going to change the world with that lot am I?
Result:  Shopping?  No, be strong Kimberley, be strong.  To be fair I already have so much craft stuff I could start my own shop.  Why is it you never have what you need for the next project though?  

Step Seven:  Requirements gathering.  I'm an analyst by trade so lets start at the beginning.  The need to be met is to create a page made from fabric.  Lets not even entertain the idea that we're working on a whole book at this point, my confidence just won't take it.  Because we're aiming for trees, nature, leaves, birds etc we want natural colours.  (So the fruit salad up-chuck fabric is out for sure).   And I want to make a collage of the fabric before I start embroidering.  
Result:  Back to self doubt.   Right I need colour variations and I don't want to spend any money.  (well not today at least).

Step Eight:  I was going to get to the point eventually, right? 😊
I keep reading peoples amazing blogs about their efforts with eco-dyes.  Now I should point out I have no, and I mean ZERO, experience with any form of dyeing, painting or even colour pencils (unless you count me picking them up after my daughter has left them lying all round the house).

The more I've read the more curious I've become.  But when you're inexperienced its also easy to become over-whelmed.  But I have to make a start right?  Thats the hardest bit, that first step.
Result:  Action.  Doing something other than pondering my own lack of skill, talent and supplies.

Step Nine:  Now to be honest it currently winter here and even in summer I don't have a garden full of Tansy, Dandelions etc.  So we're going to have to play with whatever is in the cupboard.  So we're starting with the most basic of dyes - Tea and Coffee.  We've all ruined something with one or both of those.  And I also found some acrylic craft paint, no idea if that'll 'stick' but we'll give it a go.


So here's my list of 'experiments, which are currently still drying, brewing etc.

  1. Wet fabric and then drips of coffee applied.
  2. Dry fabric this time then drips of coffee applied.
  3. Wet fabric scrunched into small balls then drips of coffee applied.
  4. Dry fabric and then coffee brushed on to cover the fabric
  5. Wet fabric then coffee stripes brushed on
  6. Wet fabric then coffee applied using the end of an old cotton reel
  7. Dry fabric then coffee applied using the end of an old cotton reel
  8. Wet fabric then watered down acrylic paint brushed across it in stripes
  9. Wet fabric then the watered down paint was watered down again and then spritzed on
  10. Dry fabric then using the watered down paint I spritzed it onto some bubble wrap and applied to the fabric.
  11. Dry fabric brewing in left over coffee
  12. Laid down some toothpicks on a piece of calico and spritzed the fabric with tea
  13. Dry fabric then dripped tea on it
  14. Wet fabric then dripped tea on it
  15. Fabric brewing in left over tea
  16. I thought Miss P would never forgive me if I didn't try sprinkles, so I did
  17. Wet fabric with Cinnamon sprinkled on it and then spritzed with water
  18. Wet fabric with Paprika sprinkled on it and then spritzed with water
  19. Wet fabric with Tumeric sprinkled on it and then spritzed with water
  20. Fabric soaking in Tumeric water
  21. Dry denim with fresh lemon slices laid on it
  22. Dry denim with fresh lemon juice dripped on it
  23. Old sheet with lemon segments laid on it
  24. Dry demin with lemon segments laid on I
  25. Used a bit of the old sheet and blotted up the lemon juice I had dropped all over the bench
  26. Found one lonely dandelion flower in the lawn, so I chopped the petals up over the last piece of linen and then spritzed it with water
  27. Threw a few seeds onto dry denim and then spritzed it with lemon juice.
  28. Laid out a few leaves onto dry denim and then spritzed with lemon juice.
Yes I got a bit carried away 😊

So I guess the next question is how long do I leave these?  As they're currently taking up most of my kitchen bench it won't be able to be that long, especially if the family wants dinner tonight.  

It'll be interesting to see what 'takes' and what doesn't.  The linen I don't think has been washed before so it was definitely resisting the liquid a bit more than the calico.  And I think I might put the lemon juice bits and bobs in the sun this afternoon (if I can find any sun that is).

And I guess most importantly will any of it be any use for my fabric book??  But I've wanted to give this a go for a while, so if nothing else I can definitely cross it off the to do list.  

Thanks for stopping by.


Dandelion petals and lemon juice with seeds/leaves
Acrylic paint


Sunday, August 20, 2017

Chicken Little #96 - Reversed Buttonhole Bar

I've had this chicken drumstick in my stash of chicken images for ages, just waiting for a chance to use it.  I'm sure some will think 'but thats not a chicken' but well this is my 'Chicken Little' project and from the start the idea was that somewhere in the project there would be a chicken.  Not necessarily a whole chicken, just a chicken.  And besides it makes me giggle to include it.

I don't think I mentioned this stitch earlier this week.  The tutorial on Pintangle is here.  I've used it to create the circle around the drumstick.


The Tree

The tree is done.  Its definitely got some issues with puckering and I don't think they're due to the fabric.  I think its all me - dang it!

Learnings:

  • I had to add some fabric to the edges to fit my 8 inch round frame, which meant I had two different types of fabric and I only did a single row of straight stitch to join them.  So they weren't that well secured.
  • I really should've used a rectangular frame.  Or been a bit braver about squashing stitches.
  • With the tree trunk to one side and then the mass of French knot flowers completely covering the width of the image I probably should have either used a stabiliser on the back, or even used a second layer of fabric as a backing fabric.
But...  I still love it.  I'm so pleased to have that hilly background.  I'm pleased I used my back to front version of split stitch for the tree trunk as its given it more texture than true split stitch would've done.  The rocks in the front could've done with some padding behind them or even a small darker thread around the edge of them to make them stand out a bit more.  But for a first effort I'm pretty chuffed.  Puckers and all.  I'd definitely use this printable fabric again.

So what to do with the puckers?
I've found a few tutorials to try and remove some of the puckering and I'm going to try this one from Mary Corbets Needle'n'Thread.  I would've loved to have a go at it today but I need to go and buy a cork board or a piece of polystyrene/foam.  I did try the ironing board but its not padded enough.


So here's the finished tree in all its puckered and un-ironed glory.  I'll let you know how the blocking goes.  I'm hoping if it doesn't help too much maybe a professional framer might be able to help, or at least hide the worst of the puckering with a nice mat.  😀  Either way I'm glad I tried it.


Now I'm just feeling a bit lost as to what to do.  The black work idea is there, but I want something I can pick up and do straight away, so I'll have to put my thinking cap on.  

That's all for now.  Thanks for stopping by.

Sunday, August 13, 2017

TAST - Zig Zag Coral

Chicken Little number 95!! Ninety FIVE chickens.  Only 5 more stitches to go in this current round of TAST.  Although it sounds like Sharon is cooking up some new challenges for next year - yay!

The zig zag coral is the peachy pink zig zag on the kite if you were wondering.  Apparently its also really useful to use as a couching stitch.

Here's the link to all 95.
Thanks Rose for pointing out I had missed adding the last couple of stitches to the album. 😁


Tree Progress

I've been making a lot of progress on the tree project.  I'll be SO over French knots by the time this project is done haha.  The weather is awful here today so the photo isn't too good, colour-wise.

As you can see the puckering seems to be getting worse.  The fabric just won't sit right in this frame.  I'm sure this is due to the larger frame and the add-on fabric to make it fit, sigh.  Well fingers crossed most of them will stretch out once its done.  

I'm not sure if you can tell from the photo, but when you look at the flowers they look quite textured. Not in a French knot texture kind of way, but more that it looks like the French knots are layered on top of each other, or some are larger making them pop out from the fabric more.  But no they're not, it must be from the changes in colour, because when you look across the fabric they're all the same size and height.  

I almost don't want to post this picture because the colours are all wrong, its so dark here today.  But an update is an update right? 😀


What Next?

How did we ever survive before the internet?  For small countries like ours we were so limited in the sharing of new ideas for craft etc.  But the internet, oh how I love thee.  And I'm sure I'm not the only one that loses hours... and hours... and hours to Pinterest.  Although I sure do get frustrated at times with it as well.  But Blackwork... I'm curious about blackwork in particular the shading side of things.  I've found some amazing patterns out there.  There are plenty of sites out there with various 'patterns' for free but I'm yet to find a good one about the shading side of things.  Anyway I think thats where I'll head next for a bit, although I'm not a big fan of counted work I've spotted an amazing ladybird picture in black work that I'm just in love with.  So we'll see... you never know which direction Pinterest will take me in next week haha.

Here's the picture thats got me all hot and bothered about black work.  I know its not strictly blackwork, what with the bright red ladybug and all.  But I love it.  Its terribly intricate looking at the detail but such a simple design overall.  (The links to the patterns are below the photos if you're interested.)


The site appears to have some beautiful patterns, check out this Blue Jay


And would life be complete without a chicken of some kind? I think not.  I had a bit of trouble finding where to buy this one.  It almost looks like he was a free pattern from a magazine? not sure.


Anyway thats it from me today.

Monday, August 7, 2017

TAST - Portuguese Stem

Chicken Little Number 94 is done... I'm pretty pleased with how this wee guy turned out.  Although it got a bit 'squishy' around his eye, even though I swapped to regular stem stitch around the eye.  But thats OK, I'm not that proficient at stem stitch as I use split stitch more.


Tree Progress

I've finished the main tree -yay!  I've done the rock in front of the tree, which weirdly ended up using the same colour range as the tree, but just without the darkest colour.  I did the two main trees in the background using seed stitch and 3 various greens.  I'm not sure about doing the other background trees, but no hurry on that decision.  Excitingly I've started on the field of flowers.  The flowers are going to take a VERY long time.  1 thread with 1 wrap French knots are so tiny!  But I think anything bigger would've been too big.

Oh Puck-er!
I usually use a 6 inch hoop for my chooks.  I like that size because I just find it a good size in my hand.  But this photo measures slightly more than that in length and I didn't want any of the stitches getting crushed.  So I swapped to an 8 inch frame, my photo is printed on A4, so I've had to add on some width to make it sit in the frame.  This has resulted in it not sitting well within the frame and I've ended up with some puckering on the edge of the tree where the trunk nearly touches the edge of the picture.  I'm hoping that when I frame it, the stretching will pull this out, it does seem to disappear when I pull the fabric tight in the frame.

So far I'm really happy with how it looks.  Even if my photo is a bit blurry at the top of the tree 😊